

How to Clean Mini-Split Indoor Units Without Removal: Professional HVAC Guide
As an HVAC contractor, you understand that proper maintenance is crucial for optimal mini-split performance and client satisfaction. While basic filter cleaning handles routine maintenance, there are times when you need to perform a deep clean on mini-split systems to restore peak efficiency. This comprehensive guide will walk you through how to clean a mini-split air conditioner thoroughly without the hassle and time expense of complete unit removal.
How to Clean Mini-Split Filters: Basic Maintenance Foundation
Before diving into deep cleaning techniques, it's essential to understand proper filter maintenance for cleaning mini-split systems effectively. Modern mini-split units have evolved from older designs that featured roll-up filters covering the front and top of the evaporator coil. Today's systems typically have filters located only at the top of the unit, making access much simpler for routine maintenance.
Locating and Removing Mini-Split Filters
When learning how to clean mini-split filters, start by identifying the filter location. Look for release tabs at the top of your indoor unit. These tabs allow you to grab and pull the filter upward, then slide it completely out of the housing. This design makes filter access straightforward during routine maintenance visits.
Best Way to Clean Mini-Split Air Conditioner Filters
The key to effectively cleaning mini-split air conditioner filters is using water only – never chemicals. Chemical cleaners can damage the filter screen material or leave residue that compromises filtration efficiency. This chemical-free approach is critical for maintaining indoor air quality and system performance.
Follow this proven technique for how to clean mini-split filters:
- Take the filter outside to your work area and ensure your water hose has appropriate pressure settings. High pressure can damage delicate filter materials, so moderate water pressure works best.
- Start by washing from the back side of the filter first, allowing debris to flow away from the screen. Then wash through the front side to remove any remaining particles. You'll notice accumulated dirt and debris washing away during this process.
When Deep Cleaning Mini-Split Systems Becomes Necessary
Understanding when to transition from basic filter cleaning to comprehensive deep cleaning is crucial for effective mini-split maintenance. Regular filter cleaning handles surface-level maintenance, but over time, mini-split systems accumulate buildup that requires more intensive cleaning methods.
How to Clean a Mini-Split: Identifying Deep Cleaning Requirements
Several indicators suggest your mini-split needs more than routine filter maintenance. The evaporator coil, which lacks filter protection on newer systems, can accumulate significant buildup over years of operation. Additionally, the blower wheel assembly may develop dust films that reduce airflow and system efficiency.
Visual inspection is key when determining deep cleaning needs. Remove the outer cover to access the evaporator coil assembly and blower wheel. Use a flashlight to shine light through the evaporator coil fins – if you can see light passing through clearly, the coil may only need light cleaning. However, if light penetration is blocked or limited, deep cleaning becomes necessary.
The blower wheel also requires inspection during this assessment. Look for dust film buildup across the wheel surfaces. Even light film accumulation can impact system performance, leading to reduced airflow, increased noise levels, and diminished cooling capacity.
Essential Equipment for Cleaning a Mini-Split Professionally
Proper equipment selection is fundamental when learning how to clean a mini-split air conditioner professionally. The right tools ensure thorough cleaning while protecting both the system and surrounding area from water damage.
HVAC Cleaning Equipment and Water Containment Systems
Professional mini-split cleaning requires a protective jacket assembly that wraps around the indoor unit. This containment system prevents water from spreading throughout the work area while providing a controlled drainage point. Connect the drainage system to a 5-gallon bucket positioned to collect all runoff water during the cleaning process.
Mini-Split Pressure Washing Equipment Specifications
Select a low-pressure washer specifically designed for HVAC applications. These units typically feature dual pressure settings – always use the low-pressure setting for mini-split cleaning to avoid component damage. High pressure can bend delicate coil fins or damage internal components, compromising system efficiency.
Before beginning any cleaning work, test your pressure washer outside the building to ensure proper operation and familiarize yourself with pressure settings. Verify all connections are secure to prevent equipment failure during the cleaning process.
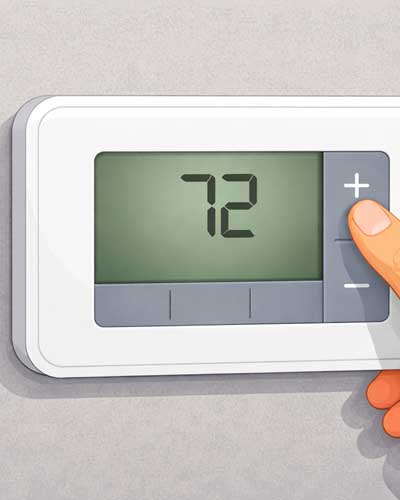
How to Clean Mini-Splits Safely: Power Disconnection Steps
Safety protocols are non-negotiable when performing deep cleaning on mini-split systems. Proper electrical disconnection protects both technician and equipment during the cleaning process.
Mini-Split Electrical Safety and Power Disconnection Procedures
The most straightforward approach for how to clean mini-splits safely involves disconnecting power at the outdoor unit. Since indoor units typically receive power through the outdoor unit, shutting off the outdoor disconnect effectively de-energizes the entire system.
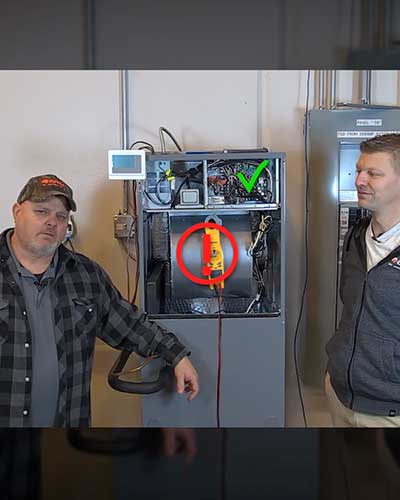
However, GREE MultiPro systems may have different power configurations. Wall-mounted indoor units in MultiPro installations sometimes feature dedicated toggle switches for individual unit power control. If your system includes this feature, use the toggle switch for convenient power disconnection.
When toggle switches aren't available, locate the appropriate circuit breaker in the electrical panel and shut down power to the entire system before beginning any disassembly work.
How to Clean a Mini-Split Unit: Step-by-Step Disassembly
Proper disassembly technique ensures safe access to internal components while preventing damage during the cleaning process. This systematic approach is essential for how to clean a mini-split air conditioner effectively.
Mini-Split Indoor Unit Component Removal
Begin disassembly by removing the outer cover completely. This provides access to the display unit, which requires careful handling during removal. Remove the display mounting screw and immediately reinstall it in its original location to prevent loss. This organization technique prevents frustration during reassembly.
Disconnect the display unit carefully, noting wire connections for proper reinstallation. The display unit should separate cleanly once electrical connections are released.
HVAC System Disassembly: Cam Slides and Hidden Screws
Modern mini-split units use cam slides for secure component mounting. These slides pop back into release position with gentle pressure. While you can use a screw gun for reinstallation, exercise caution to avoid over-torquing fasteners during reassembly.
After releasing cam slides, locate the front-mounted screws. Most units feature four screws across the front face, but larger capacity systems often include additional hidden screws. Smaller units might have one hidden screw, while larger 2.5-ton systems could have three or more hidden fasteners.
System size directly correlates with hidden screw quantity – larger capacity units require additional structural support, necessitating more fasteners. Take time to locate all fasteners before attempting complete jacket removal.
Clean Mini-Split Indoor Unit: Complete Jacket Removal
Once all screws and cam slides are released, the entire front jacket assembly should separate from the unit. This provides complete access to the evaporator coil and blower wheel assembly for thorough cleaning.
How to Clean Mini-Split Evaporator Coils: Inspection and Assessment
Proper evaporator coil evaluation determines the extent of cleaning required and helps establish realistic expectations for the cleaning process.
HVAC Coil Inspection Using Visual Assessment Techniques
With the front jacket removed, conduct a thorough visual inspection of the evaporator coil assembly. Use a flashlight or work light to shine through the coil fins from multiple angles. Clean coils allow light to pass through easily, while dirty coils block or diffuse light significantly.
Focus your inspection on areas where airflow typically carries the most debris. Look for obvious buildup, discoloration, or blocked passages between coil fins. This assessment helps determine whether light cleaning will suffice or if intensive cleaning is necessary.
Mini-Split Maintenance: Determining Coil Cleanliness Levels
Coil condition varies significantly based on operating environment, maintenance history, and system age. A coil that allows clear light penetration may only require light cleaning, while heavily soiled coils need comprehensive treatment.
Document coil condition before cleaning to establish baseline conditions and demonstrate cleaning effectiveness to clients. This documentation also helps establish future maintenance intervals for optimal system performance.
How to Clean a Mini-Split AC: Professional Blower Wheel Process
The blower wheel assembly is critical for proper airflow and system efficiency. Even light buildup can significantly impact system performance, making thorough cleaning essential for optimal operation.
Clean a Mini-Split: Identifying Blower Wheel Buildup
Examine each blower wheel surface for dust film accumulation. This buildup often appears as a light coating across wheel surfaces but can substantially reduce airflow capacity over time. Heavy buildup creates noticeable performance degradation, including reduced cooling capacity and increased system noise.
Blower wheel contamination directly impacts system efficiency. As buildup increases, the system works harder to move air, resulting in higher energy consumption and reduced client comfort. Some systems develop operational noise as contaminated wheels become unbalanced during operation.
Best Way to Clean Mini-Split Systems: Systematic Cleaning Approach
When cleaning mini-split systems, always follow proper sequence to maximize cleaning effectiveness. Clean the evaporator coil assembly first, followed by the blower wheel. This sequence ensures debris flows naturally toward the drainage system without recontaminating cleaned components.
Focus cleaning efforts on achieving thorough removal of accumulated buildup while maintaining component integrity. The pressure washer provides sufficient force to remove stubborn deposits without damaging delicate wheel surfaces.
Cleaning Mini-Split Air Conditioner: Water Management and Results
Effective water management is crucial for professional mini-split cleaning while protecting client property and demonstrating efficient resource usage.
Professional HVAC Cleaning: Water Usage and Management
Professional cleaning mini-split systems typically requires 5 gallons of water for routine cleaning applications. Heavily soiled systems may require up to 10 gallons for complete cleaning effectiveness. This efficient water usage demonstrates professional resource management while achieving thorough cleaning results.
The protective jacket assembly and drainage system prevent water damage to surrounding areas while containing all cleaning runoff. Properly positioned collection buckets capture all drainage, preventing property damage and demonstrating professional installation techniques.
How to Clean Mini-Split Air Conditioner Without Chemicals
One of the most important aspects of how to clean a mini-split air conditioner professionally is avoiding chemical cleaners entirely. Accumulated dirt and debris respond effectively to proper pressure washing techniques without requiring harsh chemicals that could damage system components.
The pressure washer provides sufficient cleaning force to remove even stubborn buildup while maintaining component integrity. This approach eliminates concerns about chemical residue affecting system performance or indoor air quality.
Mini-Split Deep Cleaning: Achieving Professional Results
Proper cleaning technique produces dramatic results with minimal water usage and no chemical treatments. The blower wheel, even when only lightly soiled, shows remarkable improvement after proper cleaning. What appeared as dusty, film-covered surfaces transform to like-new condition through systematic pressure washing.
The cleaning process generates minimal splash-back when proper technique is employed, though some water contact is inevitable during thorough cleaning. Professional containment systems minimize this issue while ensuring complete cleaning effectiveness.
Long-term System Performance Benefits
Regular professional cleaning maintains peak system efficiency while extending equipment lifespan. Clean evaporator coils and blower wheels operate more efficiently, reducing energy consumption and improving client comfort. This preventive approach also identifies potential issues before they develop into costly repairs.
Professional maintenance demonstrates value to clients through improved system performance, reduced energy costs, and extended equipment life. These benefits justify regular maintenance investments while building long-term client relationships.
As HVAC professionals, understanding how to clean mini-split air conditioner systems effectively without removal provides significant advantages in efficiency and client service. This comprehensive approach combines proper equipment, systematic techniques, and professional safety protocols to deliver superior results while protecting system integrity and client property.
Be sure to sign your team up for a GREE group training session so that you're all familiar with troubleshooting and maintaining GREE products! As GREE contractors, you can use our System Builder App to create custom HVAC solutions for your clients.
The techniques outlined in this guide represent field-tested approaches that professional contractors use daily to maintain mini-split systems effectively. For additional guidance, GREE offers instructional videos and an FAQ page, providing valuable resources for your installation and maintenance projects. With your expertise and GREE's reliable solutions, you can deliver the ultimate climate control experience to your clients' homes and businesses.